理解 ROS 2 的 node 和 topic
分类:
1. 理解 node
node 是 ROS 2 实现模块化的基本组件。ROS 中的每个 node 都应负责单一的模块化功能,例如控制车轮电机或发布来自激光测距仪的传感器数据。每个 node 都可以通过 topic、服务、动作或参数与其他 node 发送和接收数据。
一个完整的机器人系统由许多协同工作的 node 组成。在 ROS 2 中,一个可执行文件(C++ 程序、Python 程序等)可以包含一个或多个 node。
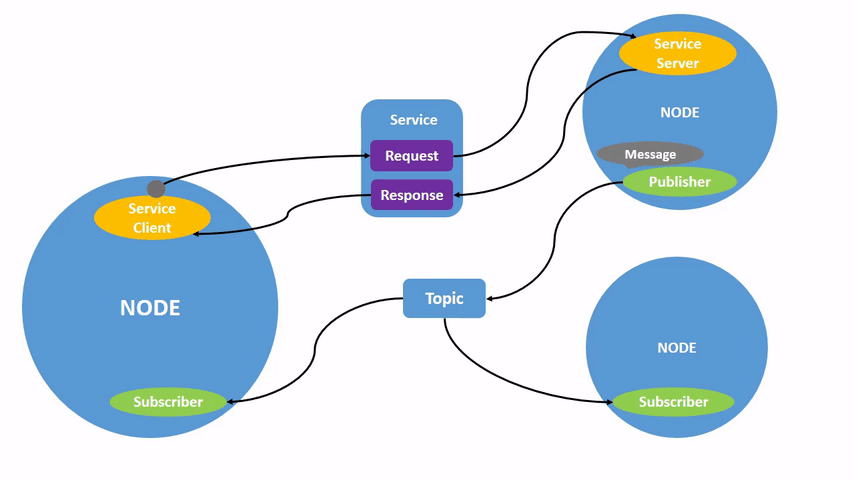
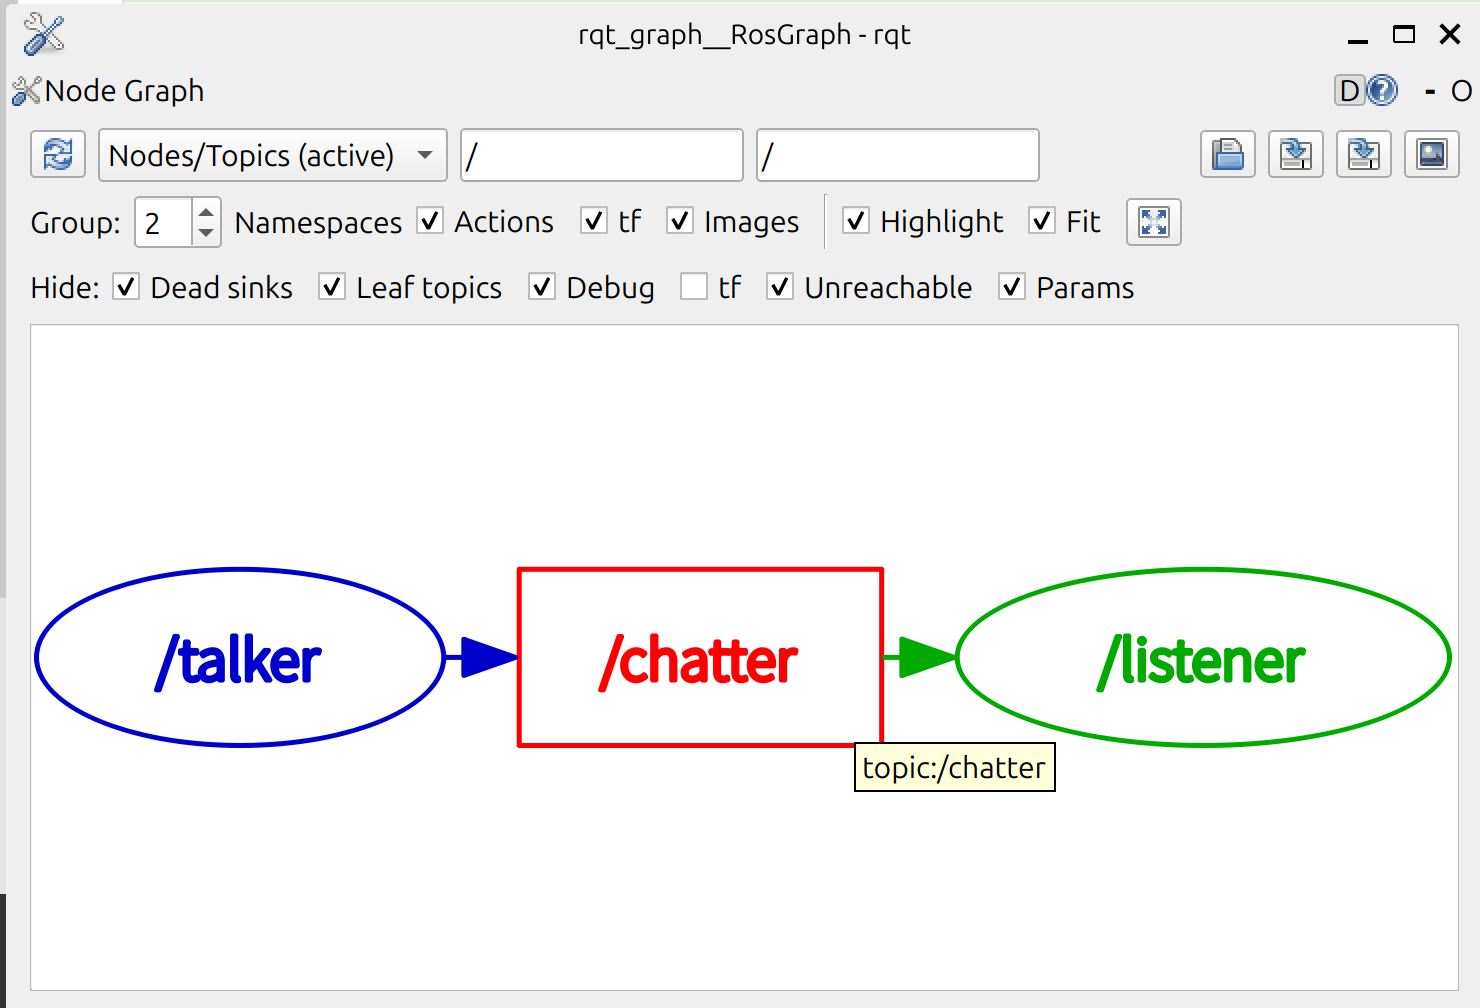
上图展示了两个 ROS 2 node 是如何交互的。
1.1 ROS 2 启动命令
使用以下命令启动 node:
ros2 run <package_name> <executable_name>
例如:
ros2 run demo_nodes_cpp talker
其中 demo_nodes_cpp 是包名字,talker 是可执行文件名。
1.2 查看 node 列表
node 名称可以使用以下命令查找:
ros2 node list
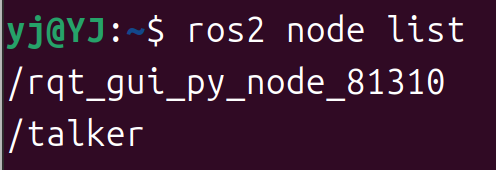
可以看到 /talker 已经显示出来了。
1.3 node 名称重映射(Remapping)
通过 --remap 参数可以重映射 node 名称:
ros2 run turtlesim turtlesim_node --ros-args --remap __node:=my_turtle
上述命令中 --remap __node:=my_turtle 将 node 名称定义为 my_turtle,通过 ros2 node list 应该也可以看到这个新建的实例 /my_turtle。
1.4 查看 node 信息
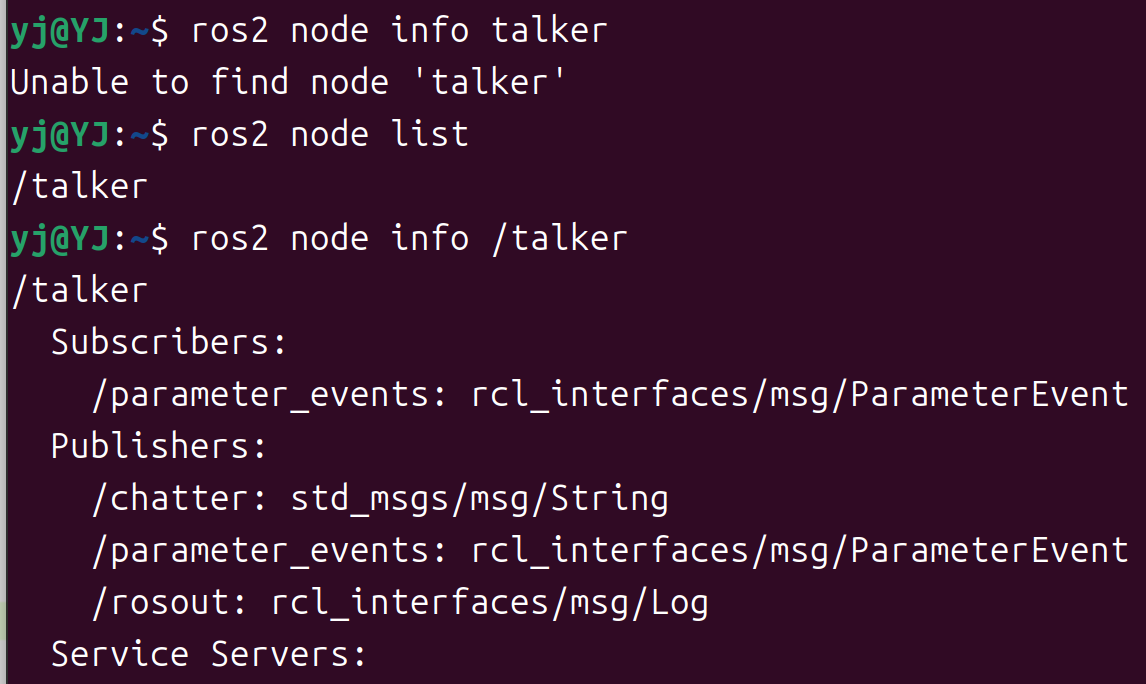
使用以下命令查看 node 的详细信息:
ros2 node info <node_name>
例如:
ros2 node info /talker
注意要加斜杠。
2. 理解 topic
在上个章节的图片中,我们已经可以看到,publisher node 通过 topic 将信息发送给 subscriber 的过程,只要一个 node 订阅了 topic,就可以收到对应的消息。
ROS 2 将复杂的系统分解为许多模块化 node。topic 是 ROS 图的重要元素,充当 node 交换消息的总线。

一个 node 可以将数据发布到任意数量的 topic,并同时订阅任意数量的 topic。
topic 是在 node 之间以及系统不同部分之间移动数据的主要方式之一。
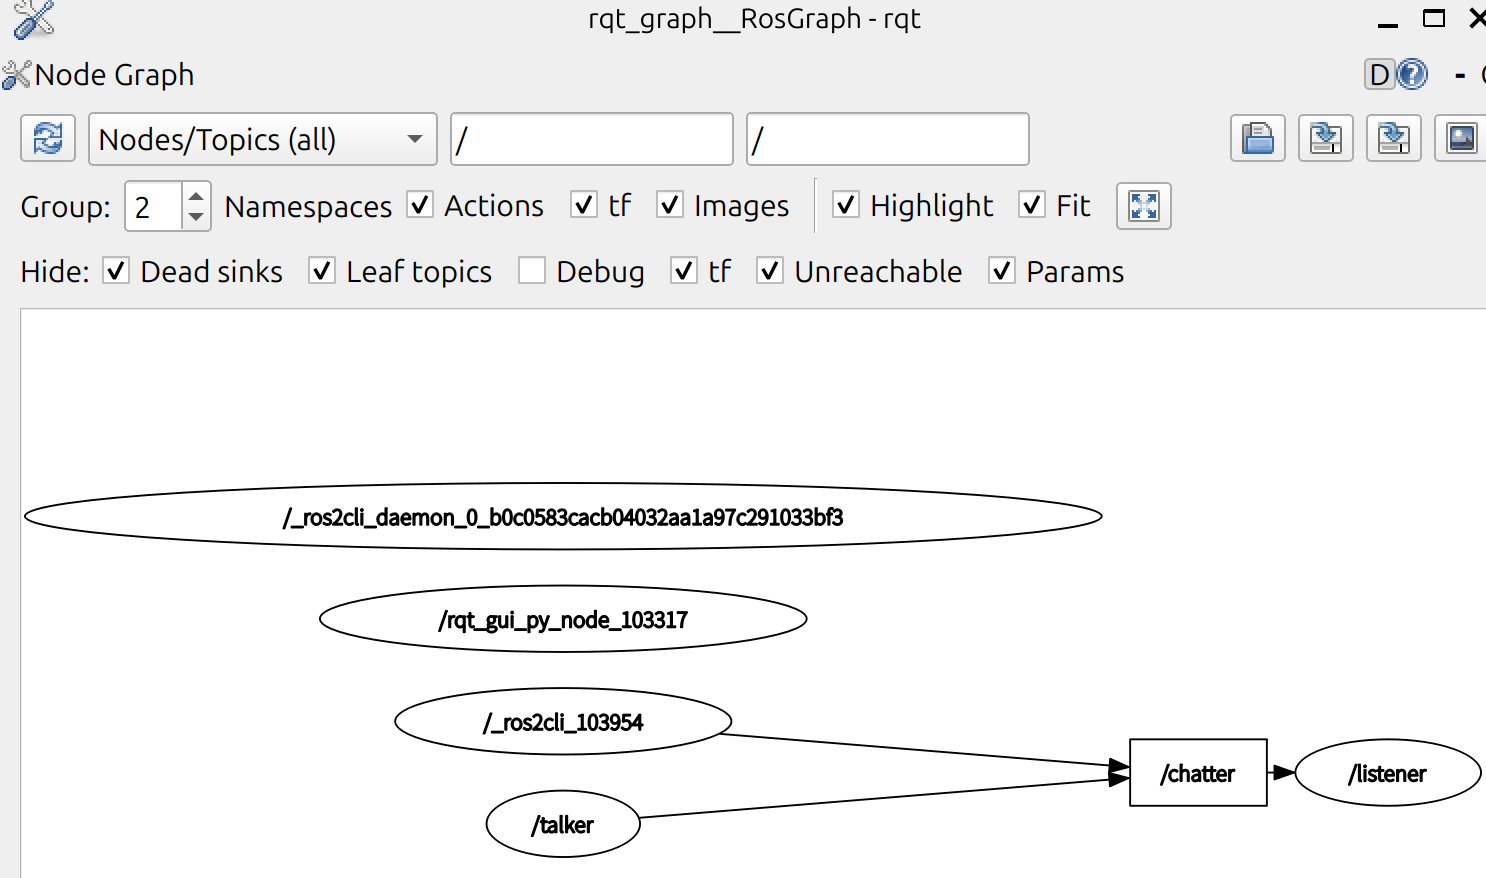
2.1 使用 rqt_graph 检查通信状态
通过 rqt_graph 可以可视化检查当前 ROS 2 系统的通信状态:
- 打开第一个终端,启动 talker node:
ros2 run demo_nodes_cpp talker
- 打开第二个终端,启动 listener node:
ros2 run demo_nodes_cpp listener
- 使用以下命令打开 rqt_graph:
ros2 run rqt_graph rqt_graph
可以看到 talker 和 listener 通过 /chatter 这个 topic 建立通信。node 正在向 topic 发布数据,并且该 node 订阅了该 topic 以接收数据。
rqt_graph 的突出显示功能在检查具有许多 node 和 topic 以多种不同方式连接的更复杂的系统时非常有用。
2.2 查看 topic 列表
在新终端中运行以下命令将返回系统中当前活动的所有 topic 的列表:
ros2 topic list
重要:使用 -t 参数可以在括号中附加 topic 类型:
ros2 topic list -t
输出示例:
/chatter [std_msgs/msg/String]
/parameter_events [rcl_interfaces/msg/ParameterEvent]
/rosout [rcl_interfaces/msg/Log]
topic 类型是本文档的重要内容,后续对 topic 的命令行应用都基于类型进行。
2.3 查看 topic 信息
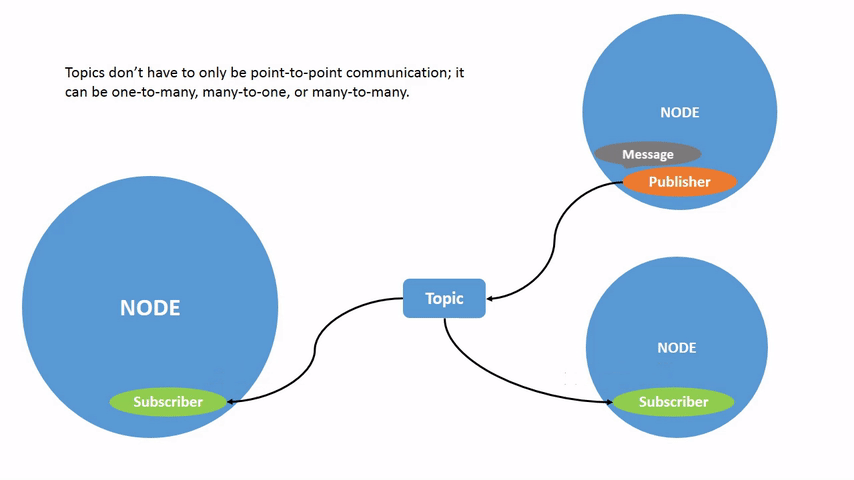
topic 不必只是一对一的交流;它们可以是一对多、多对一或多对多。通过以下命令来查看当前订阅数量:
ros2 topic info /chatter
返回示例:
Type: std_msgs/msg/String
Publisher count: 1
Subscription count: 1
2.4 查看 topic 数据
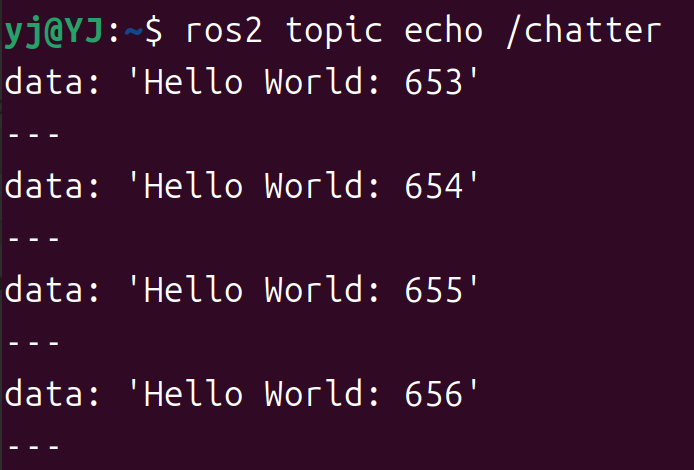
使用以下命令查看正在发布的 topic 数据:
ros2 topic echo <topic_name>
例如:
ros2 topic echo /chatter
注意 topic 名称前要加斜杠。
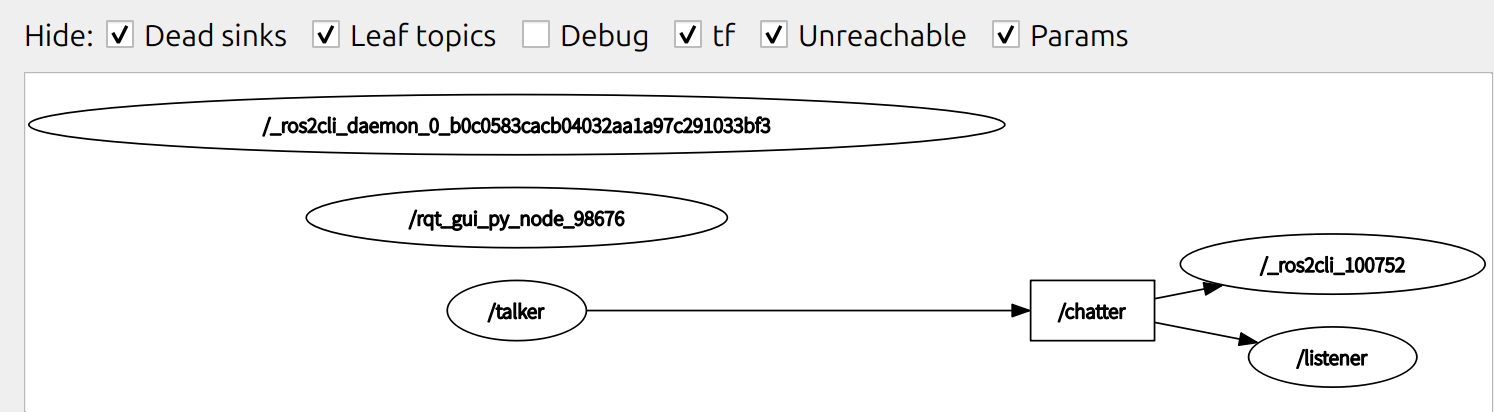
现在返回 rqt_graph 并取消选中 “debug” 框,可以见到新增的订阅 /_ros2cli_100752,也就是刚才我们通过命令行命令 echo 创建的 node。
2.5 查看接口/数据结构
在前面运行过了 ros2 topic list -t 后,得知了 /chatter 的接口为 [std_msgs/msg/String]。
运行以下命令查看接口定义:
ros2 interface show std_msgs/msg/String
返回:
# This was originally provided as an example message.
# It is deprecated as of Foxy
# It is recommended to create your own semantically meaningful message.
# However if you would like to continue using this please use the equivalent in example_msgs.

string data
可以得知为字符串数据结构,字段为 data。
2.6 发布 topic 消息
得知消息结构后,通过以下命令可以直接从终端发送命令数据到 topic 中:
ros2 topic pub <topic_name> <msg_type> '<args>'
<args> 是要传递给 topic 的实际数据,采用正确的数据结构。如上 interface 为 string data 时,data 就是构建 YAML 字符串的 key。
如下几种方式都可以发布:
- 构建 YAML 字符串发布:
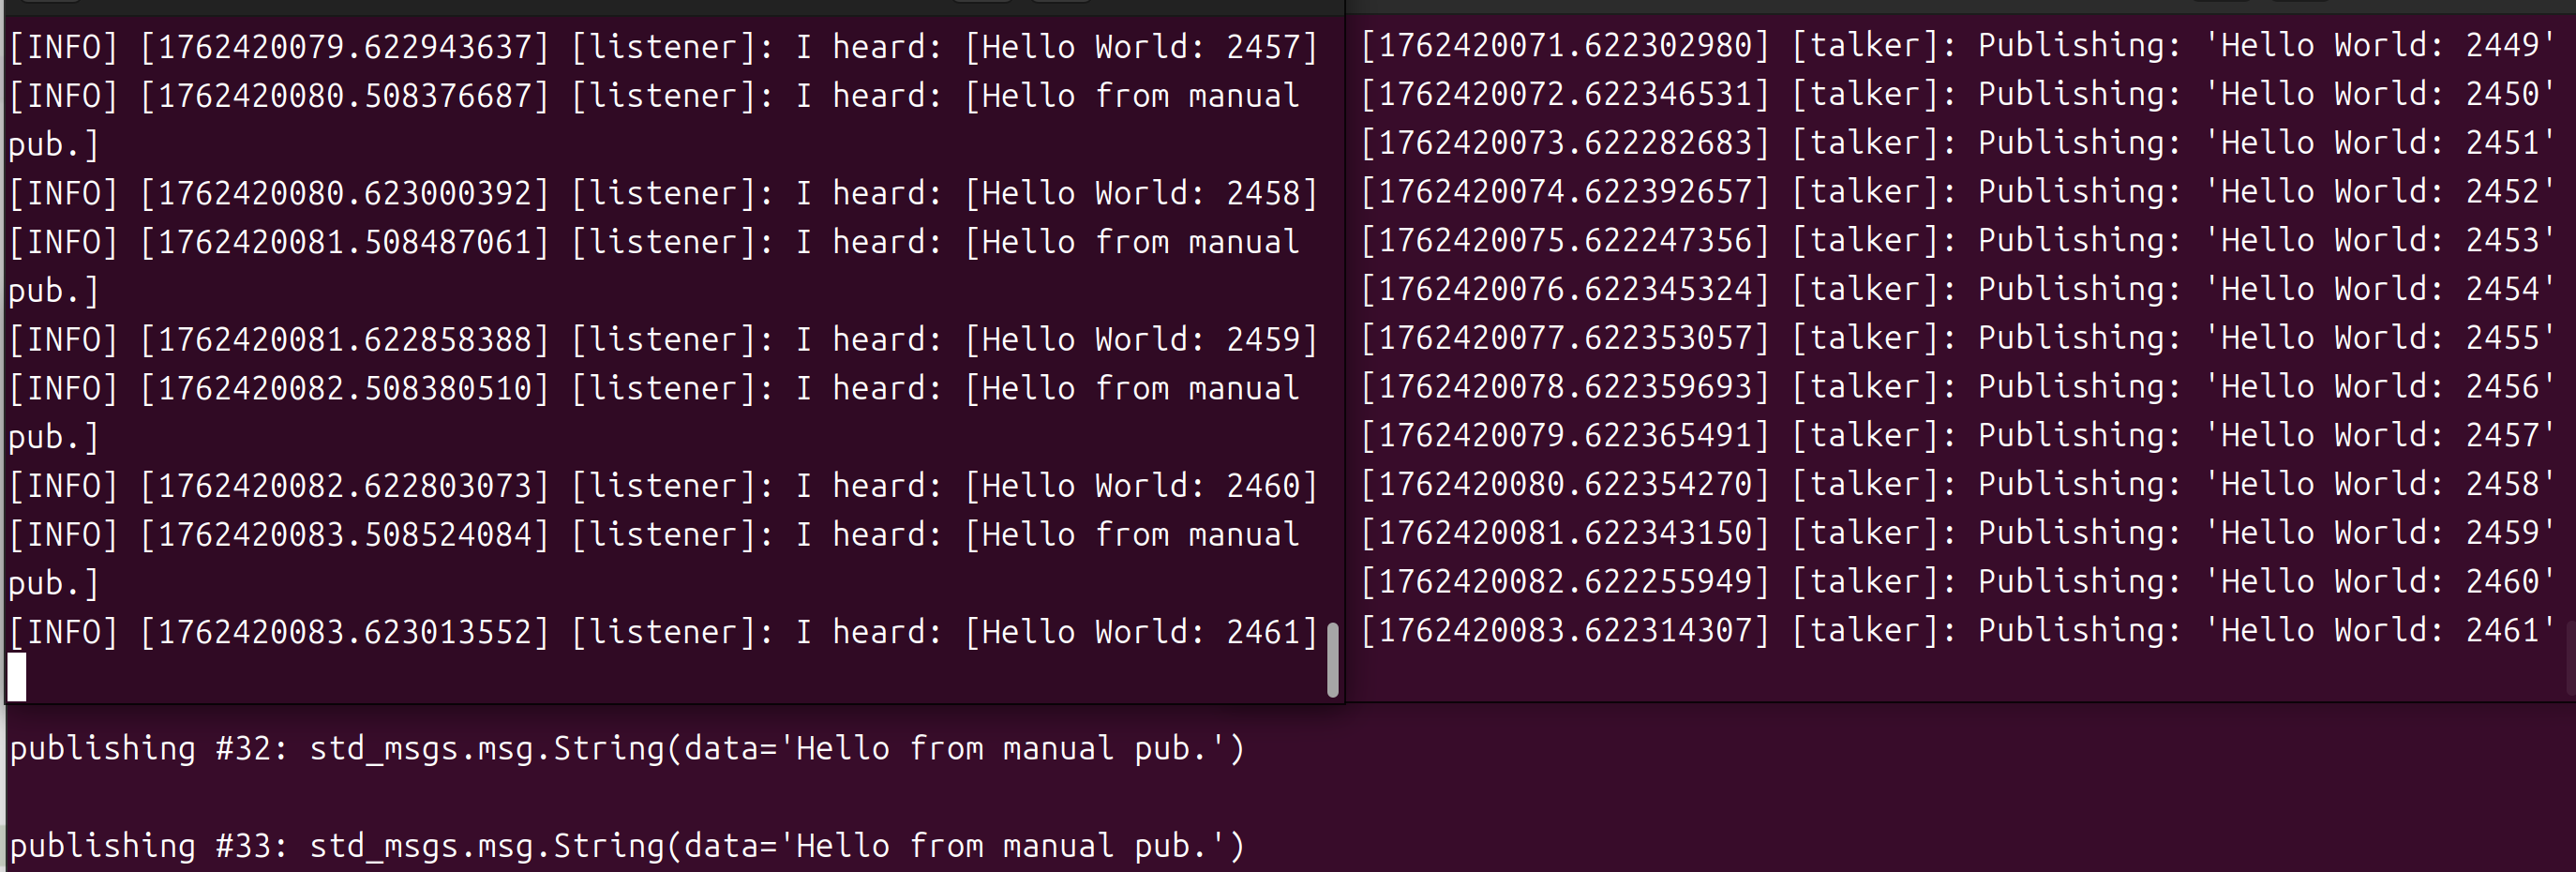
ros2 topic pub /chatter std_msgs/msg/String "{data: 'Hello from manual pub.'}"
可以看到 subscriber node 同时收到了两个 node 的信息。
- 发布空数据:
ros2 topic pub /chatter std_msgs/msg/String
因为很少会使用到手动 pub 消息,其他两种自动构建数据结构并发布的方式暂时不考虑。
消息的时间戳
当发布带时间戳的消息时,pub 有两种方法可以自动填充当前时间。对于带有 std_msgs/msg/Header 的消息,可以将 header 字段设置为 auto 来填充 stamp 字段。
ros2 topic pub /chatter std_msgs/msg/String "{header: \"auto\", data: 'Hello from manual pub.'}"
此时会报错,因为 std_msgs/msg/String 类型没有 header 字段。
2.7 查询 topic 发布频率
使用以下命令来得知对应 topic 的发布频率:
ros2 topic hz <topic>
例如:
ros2 topic hz /chatter
在检测后会返回:
average rate: 1.000
min: 1.000s max: 1.000s std dev: 0.00021s window: 3
2.8 查询 topic 带宽
使用以下命令查询 topic 的带宽使用情况:
ros2 topic bw <topic>
例如:
ros2 topic bw /chatter
输出示例:
Subscribed to [/chatter]
49 B/s from 2 messages
Message size mean: 28 B min: 28 B max: 28 B
39 B/s from 3 messages
Message size mean: 28 B min: 28 B max: 28 B
返回带宽利用率和发布到 topic 的消息数量。
2.9 查询指定类型的 topic
列出给定类型的可用 topic 列表:
ros2 topic find <topic_type>
根据前文可以得知,topic_type 为 ros2 topic list -t 返回的括号中的内容,例如 std_msgs/msg/String。
执行:
ros2 topic find std_msgs/msg/String
输出:
/chatter
3. 总结
node 通过 topic 发布信息,允许任意数量的其他 node 订阅和访问该信息。笔记中使用 rqt_graph 和命令行工具检查了 topic 上多个 node 之间的连接。由此,可以初步理解数据如何在 ROS 2 系统中移动。
4. 参考文档
请我喝杯咖啡
如果本文对你有帮助,欢迎打赏支持作者。